This site contains affiliate links to products. A commission may be received for purchases made through these links. This site is also a participant in the Amazon Services LLC Associates Program, an affiliate advertising program designed to provide a means for us to earn fees by linking to Amazon.com and affiliated sites.
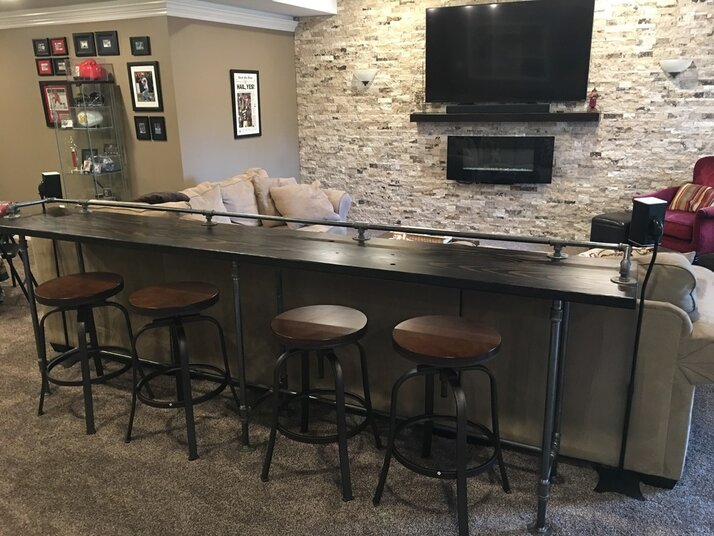
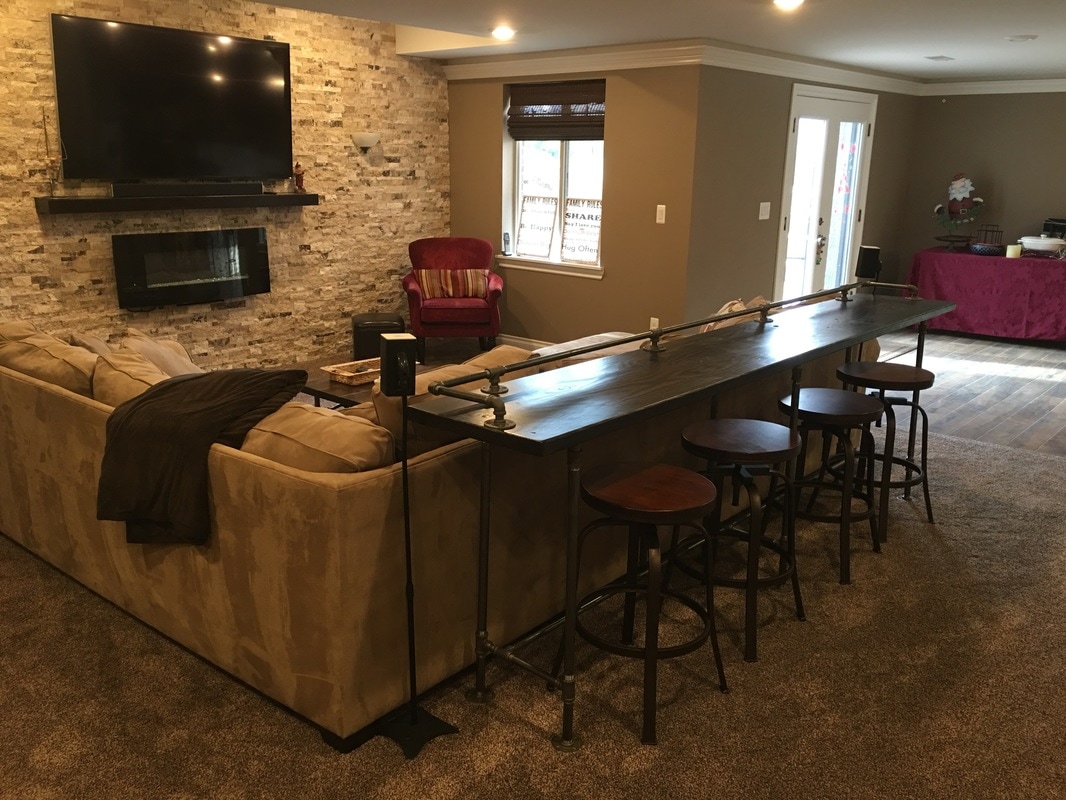
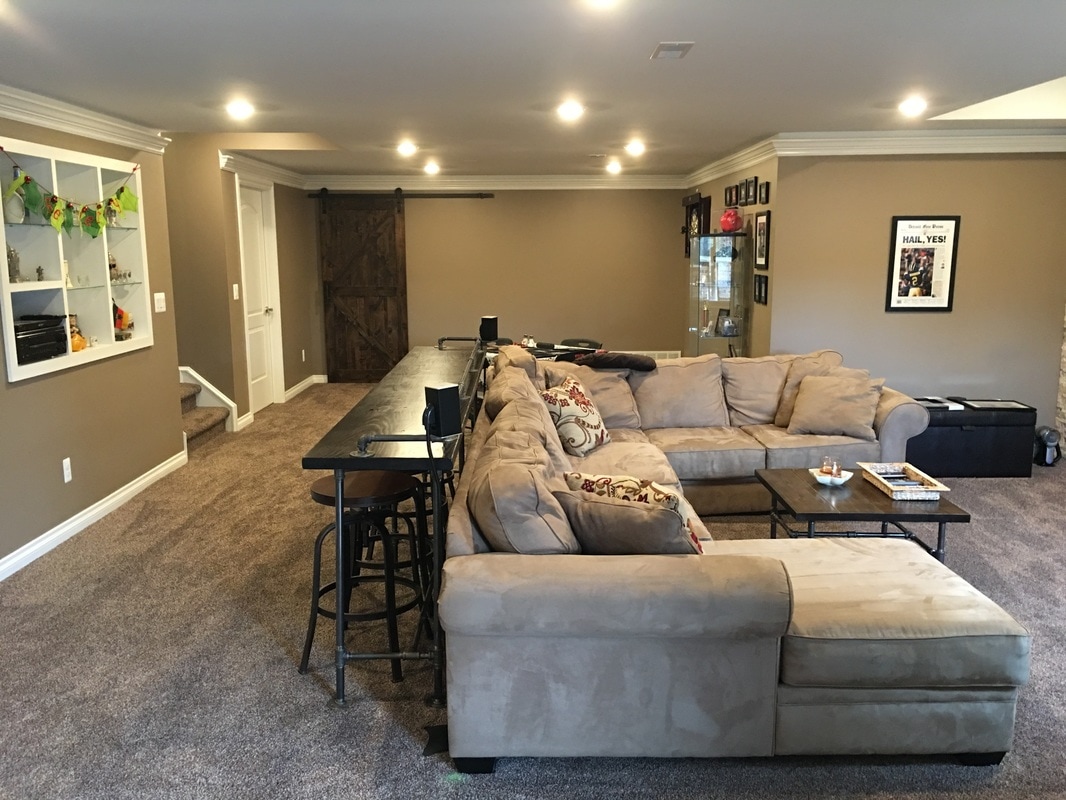
I need to add a disclaimer here; I found a picture of this sofa bar table on the internet. There were absolutely no details whatsoever, except for a picture, so I decided to create my own DIY instructions on how I built it.
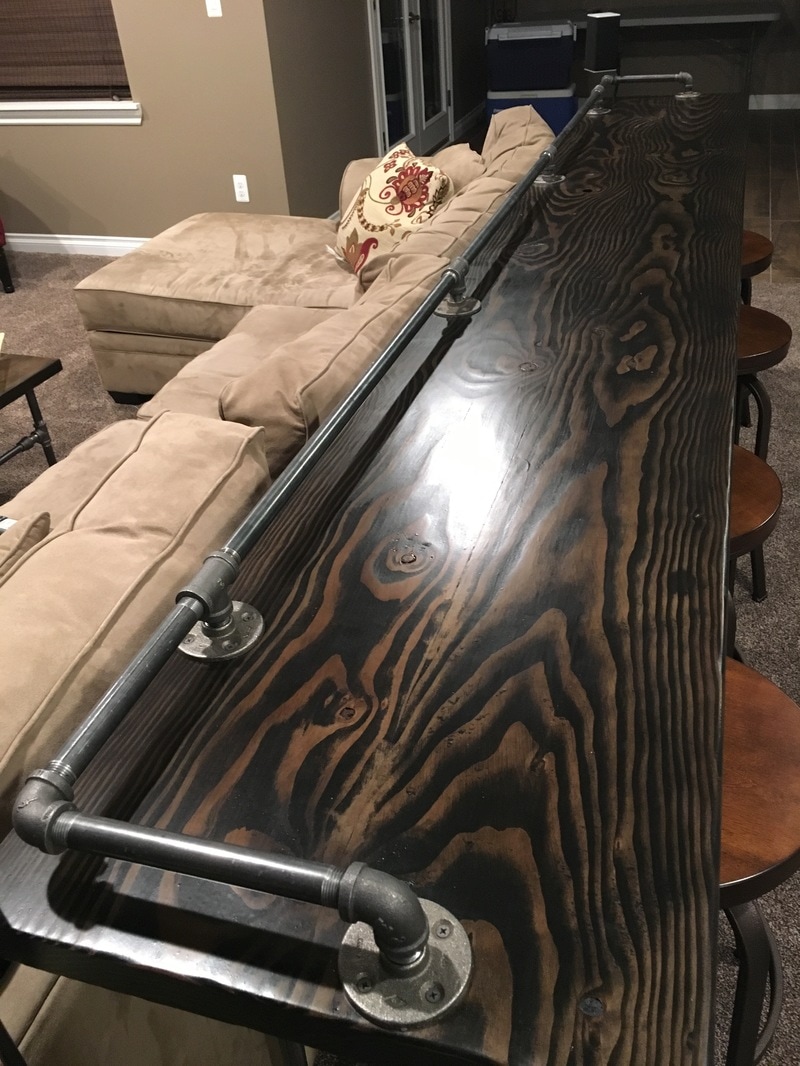
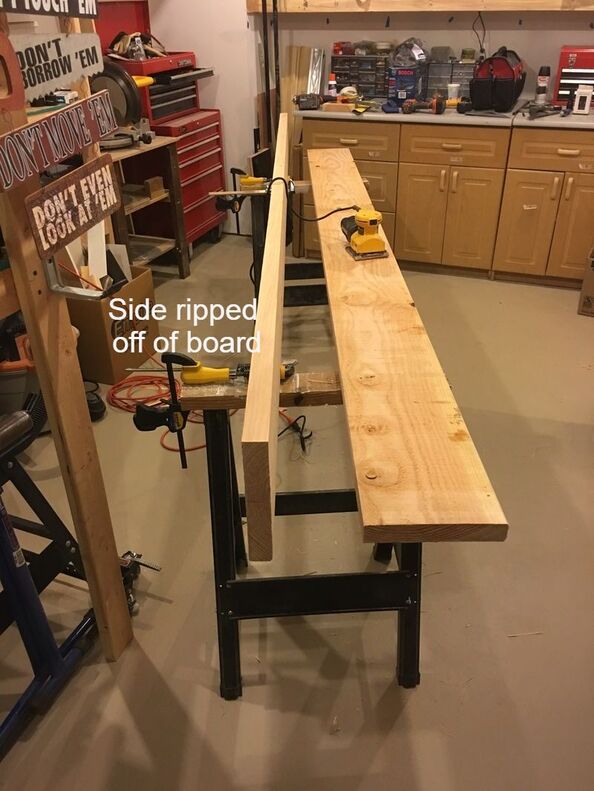
Rip one side off of each board to create square edges. This will eliminate a groove between the boards. I did a quick sanding on the sides to clean them up, but be careful not to round the edges.
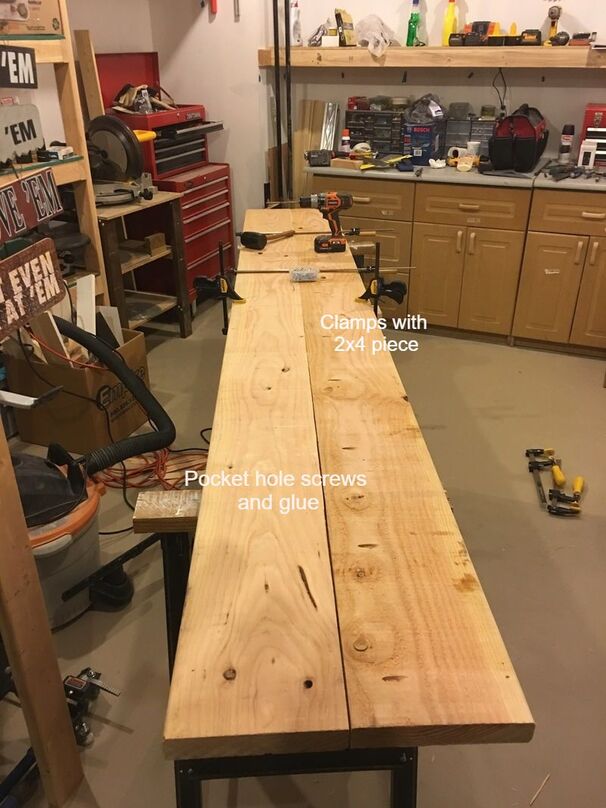
I used glue and pocket hole screws to secure the pieces together. You can use only glue if you don't have a Kreg pocket hole jig (Google this if you don't know what it is). I used clamps and pieces of 2x4s to hold the pieces flat as I screwed them together. Make sure the two boards remain flat when you screw them together.
The boards fit together nicely. There is very little gap between the boards and they appear to be relatively flat. A good start!
It was tough to find completely straight boards that also had nice smooth surfaces. I ended up with boards that needed quite a bit of sanding. I started with my belt sander and an 80 grit belt. Once I had the major defects sanded out I used my random orbit sander. I sanded with 80, 110, and 220 grit sandpaper until the surface was smooth. This is a bar table and I wanted a rustic look so some imperfections were desirable.